Roles and Permissions allow you to control what users can see and do within your Lutrack Inventory account. This is important to ensure that users only have access to the information and functionality they need to perform their jobs.
1. From the Settings menu, locate the Roles & Permissions option. Clicking this will open the Roles & Permissions management interface.
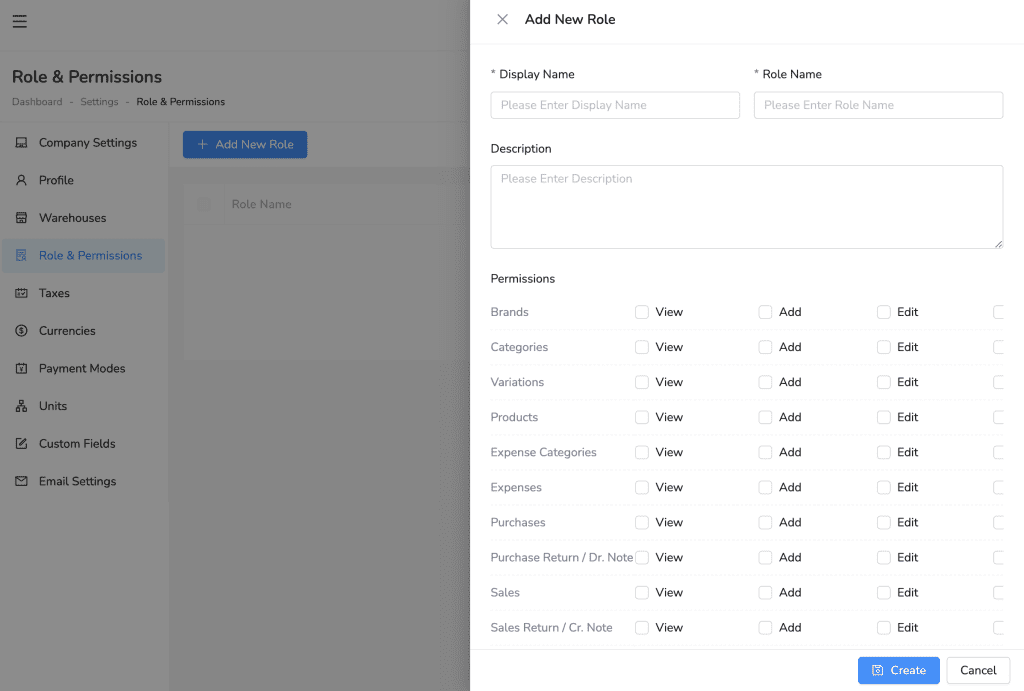
2. Click the + Add New Role button.
3. Enter a Display Name for the role. This is the name that will be shown to users when assigning roles.
4. Enter a Role Name. This is the internal reference name for the role.
5. Optionally, enter a brief Description of the role and its responsibilities.
6. Assign Permissions to the Role.
- The permission settings are divided into sections such as Dashboard, Settings, Products, Sales, Purchases, and more.
- Each section contains a list of actions that users with this role can perform. These actions may include View, Add, Edit, and Delete.
- For each section, select the level of permission you want to assign to the role by checking the appropriate boxes.
- View allows users to see information within that section.
- Add allows users to create new entries within that section.
- Edit allows users to modify existing entries within that section.
- Delete allows users to delete entries within that section.
7. Once you have configured the permissions for the new role, click the Create button to save the role.
By following these steps, you can create custom roles and permissions in Lutrack Inventory to control user access and ensure data security within your business.