Effective team management and Human Resource Management (HRM) are crucial for maintaining a productive and motivated workforce. This section of the platform provides comprehensive tools to manage employee details, track attendance, process payroll, handle leave requests, and recognize employee achievements. With features like holidays, appreciations, leaves, attendance, payroll, and HRM settings, you can efficiently oversee and support your team’s needs, ensuring a well-organized and harmonious workplace.
Basic Settings #
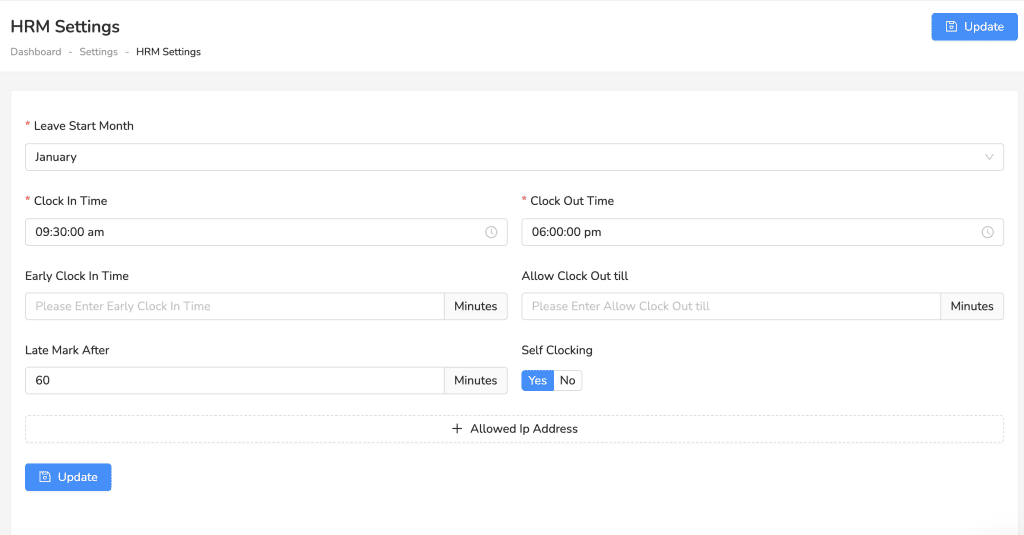
To configure the Human Resource Management (HRM) settings in your system, follow these steps:
- Navigate to HRM Settings: In the main menu, click on “HRM” to expand the options, then select “HRM Settings.”
- Set Leave Start Month: Choose the month when the leave period starts from the dropdown menu labeled “Leave Start Month.”
- Define Clock In and Clock Out Times:
- Set the standard clock-in time by entering it in the “Clock In Time” field.
- Set the standard clock-out time by entering it in the “Clock Out Time” field.
- Configure Early and Late Clocking Times (optional):
- If you allow early clock-in, enter the allowable time in the “Early Clock In Time” field.
- Specify the duration after the standard clock-in time to mark late arrivals in the “Late Mark After” field.
- Allow Clock Out Time Extension (optional):
- Enter the duration until when clock out is allowed in the “Allow Clock Out till” field.
- Enable Self Clocking:
- Toggle the “Self Clocking” option to “Yes” or “No” depending on whether you allow employees to clock in and out by themselves.
- Set Allowed IP Addresses (optional):
- Click on the “+ Allowed IP Address” link to specify which IP addresses are permitted to access the clocking system.
- Save the Settings: Once all the fields are filled out according to your requirements, click on the “Update” button to save the HRM settings.
Managing Attendance #
To effectively manage attendance in your HRM system, follow these steps to ensure accurate tracking and reporting.
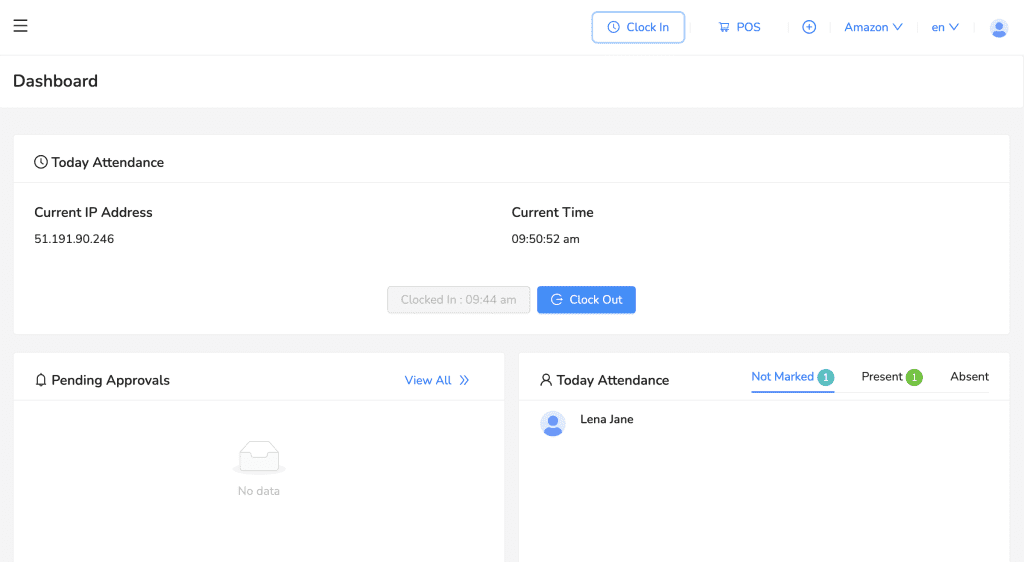
- Clocking In and Out:
- Navigate to the Dashboard and locate the “Today Attendance” section.
- Click the “Clock In” button to start recording your attendance.
- When your work period is over, click the “Clock Out” button to end the recording.
- The system will display your clock-in and clock-out times, along with the current IP address and total duration of your work period.
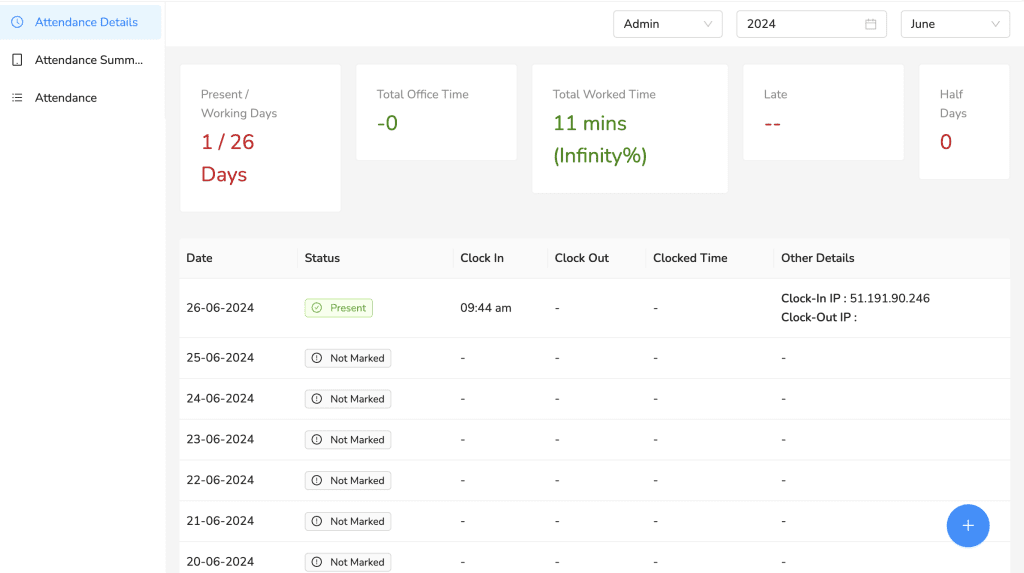
- Viewing Attendance Records:
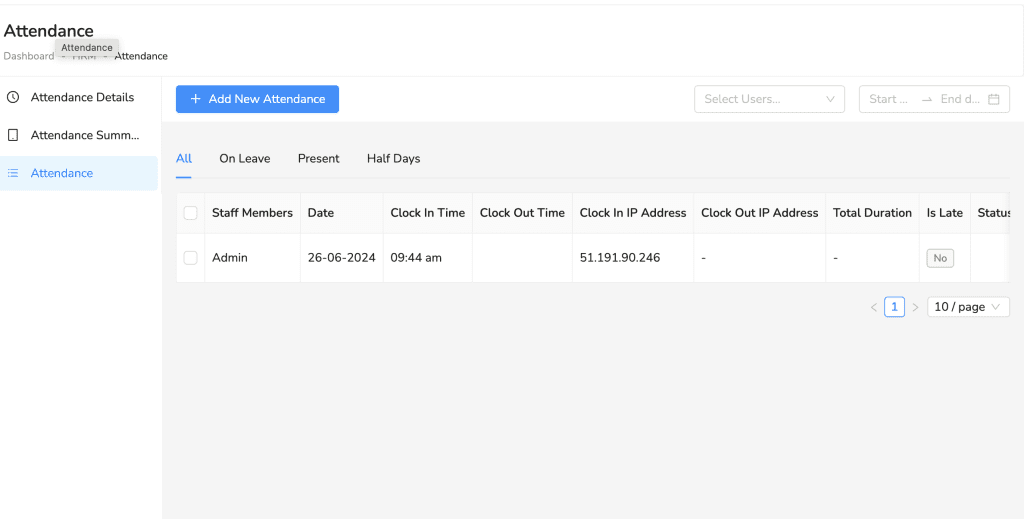
- Go to the “Attendance” section from the HRM menu.
- In the “Attendance Details” tab, you can view daily attendance records, including clock-in and clock-out times, IP addresses, total duration, and late marks.
- The “Attendance Summary” tab provides a monthly overview, showing attendance statuses such as Present, Absent, On Leave, Half Days, and Holidays for each staff member.
3. Editing and Adding Attendance Entries
- To manually add or edit an attendance entry, click the “Add New Attendance” button.
- Fill in the necessary details such as the staff member’s name, date, clock-in and clock-out times, and any additional notes.
Managing Payroll #
The Payroll section allows you to manage employee salaries, process payments, and keep track of salary increments and promotions efficiently. To effectively manage payroll in your HRM system, follow these steps to ensure efficient management.
- Access Payroll Settings:
- Navigate to the “HRM” section in the sidebar menu and click on “Payroll.”
- Setting Up Basic Salary:
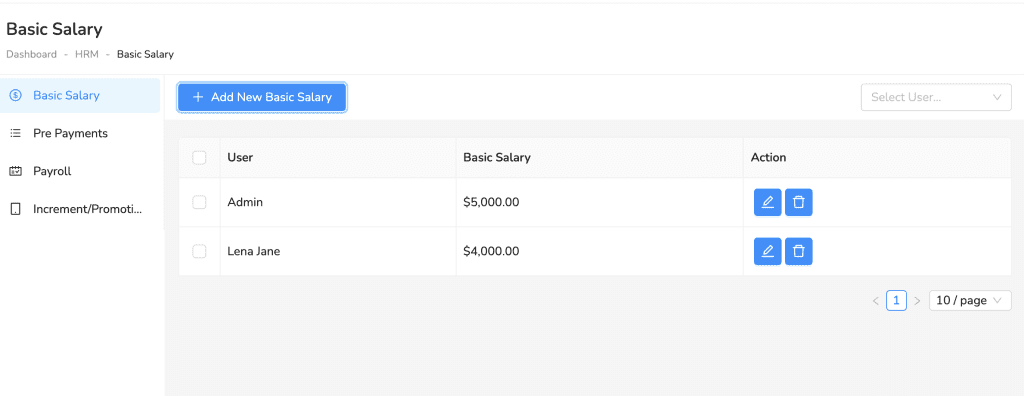
- Click on “Basic Salary” from the Payroll menu.
- To add a new basic salary, click on the “Add New Basic Salary” button.
- Fill in the required details, including the user, and basic salary amount, and save the information.
3. Processing Pre Payments
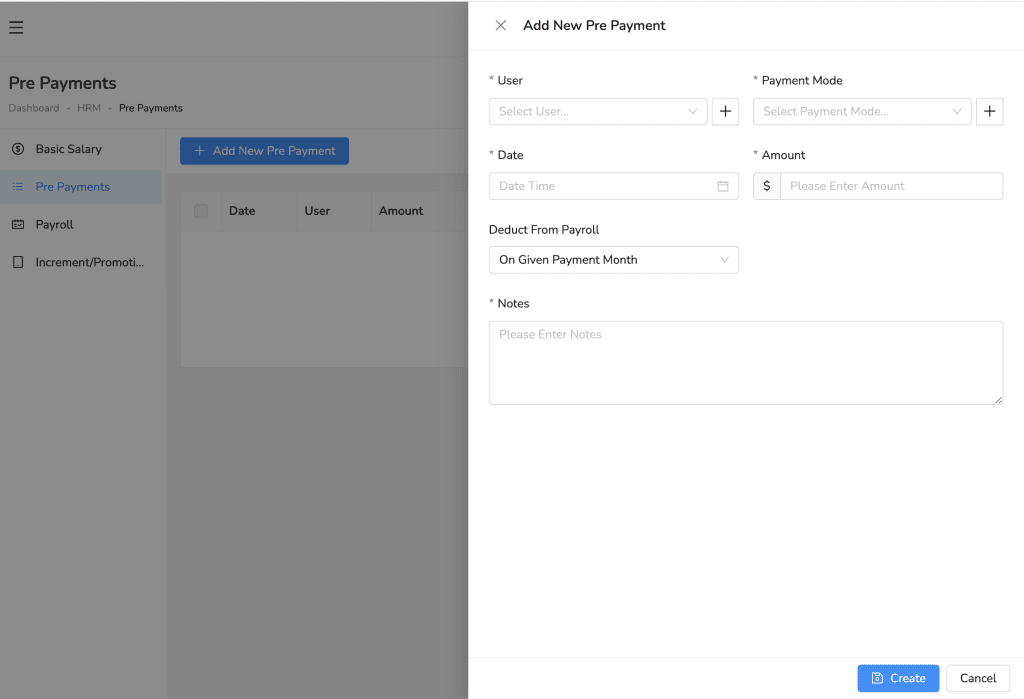
- Select “Pre Payments” from the Payroll menu.
- To add a new pre-payment, click on the “Add New Pre Payment” button.
- Complete the form with the user, payment mode, date, amount, and any notes, then click “Create.”
4. Generating Payroll
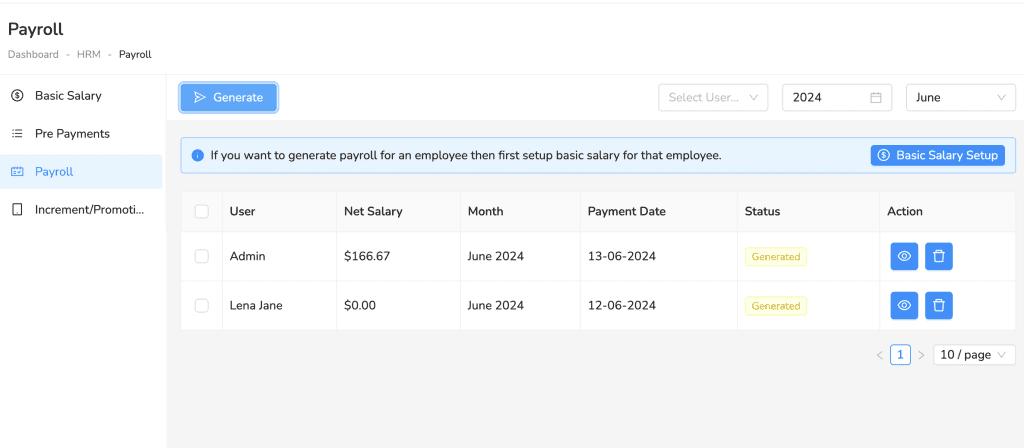
- Under the “Payroll” section, you can view all employee payroll details.
- To generate payroll for an employee, click the “Generate” button.
- Ensure that the basic salary for the employee is set up first.
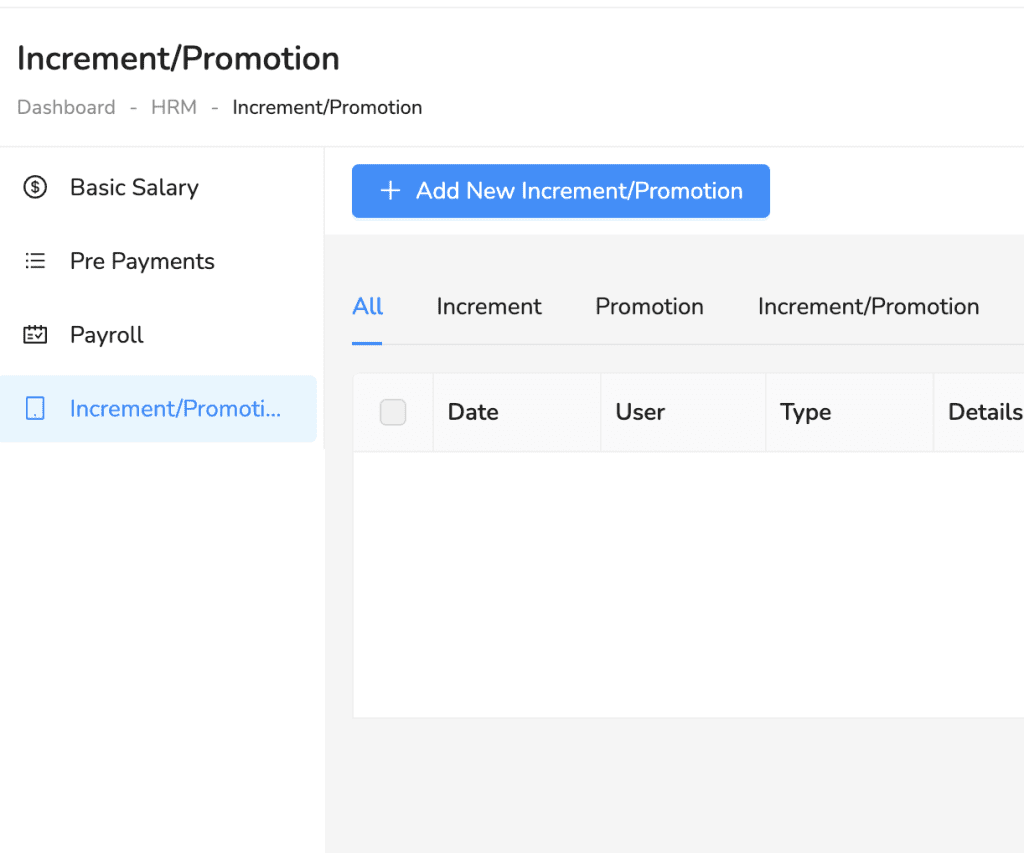
5. Managing Increments and Promotions
- Click on “Increment/Promotion” from the Payroll menu.
- Add new increments or promotions by clicking on the “Add New Increment/Promotion” button.
- Fill out the details including the user, type (increment or promotion), and any additional details.
Leave Management #
The Leave Management section allows you to handle employee leave requests, define leave types, and track remaining and unpaid leaves efficiently.
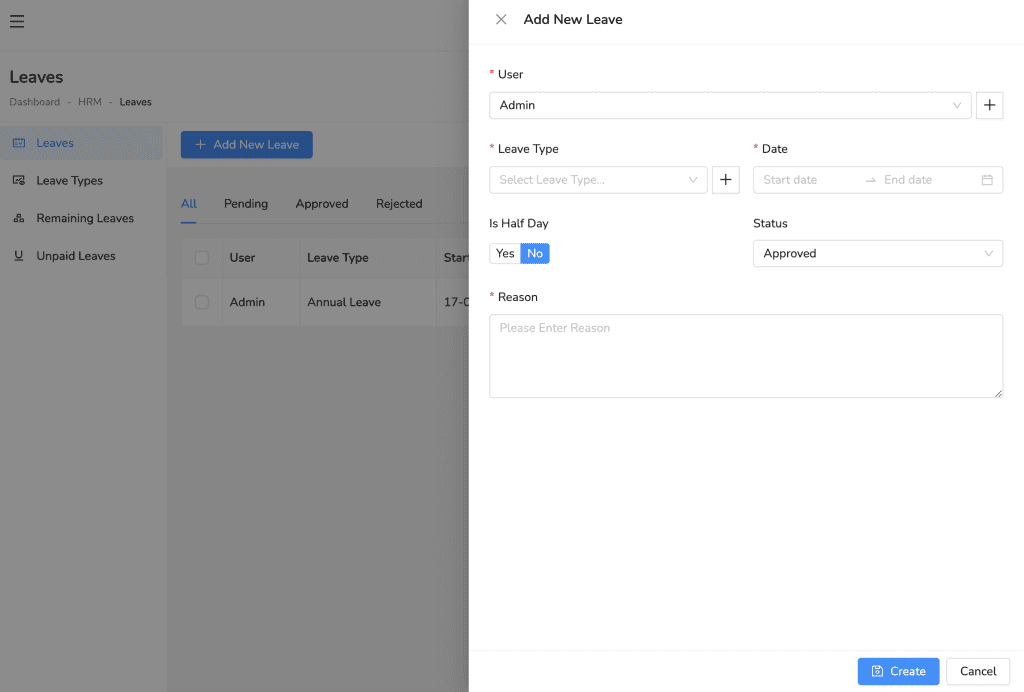
Adding a New Leave:
- Navigate to the “Leaves” section from the HRM menu.
- Click on the “+ Add New Leave” button.
- Fill in the required details such as User, Leave Type, Date, and Reason.
- Select whether it’s a half day and the leave status (e.g., Approved, Pending, Rejected).
- Click “Create” to add the new leave.
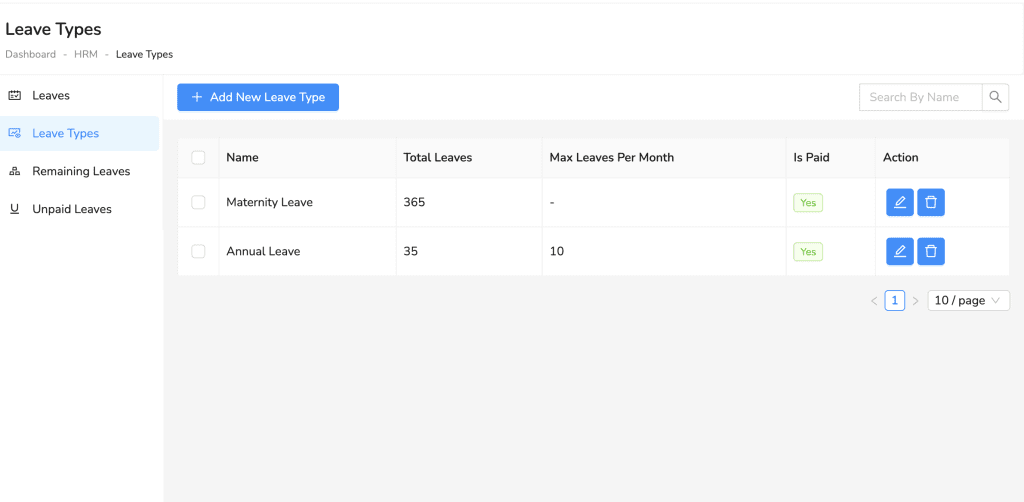
Defining Leave Types:
- Go to the “Leave Types” section from the HRM menu.
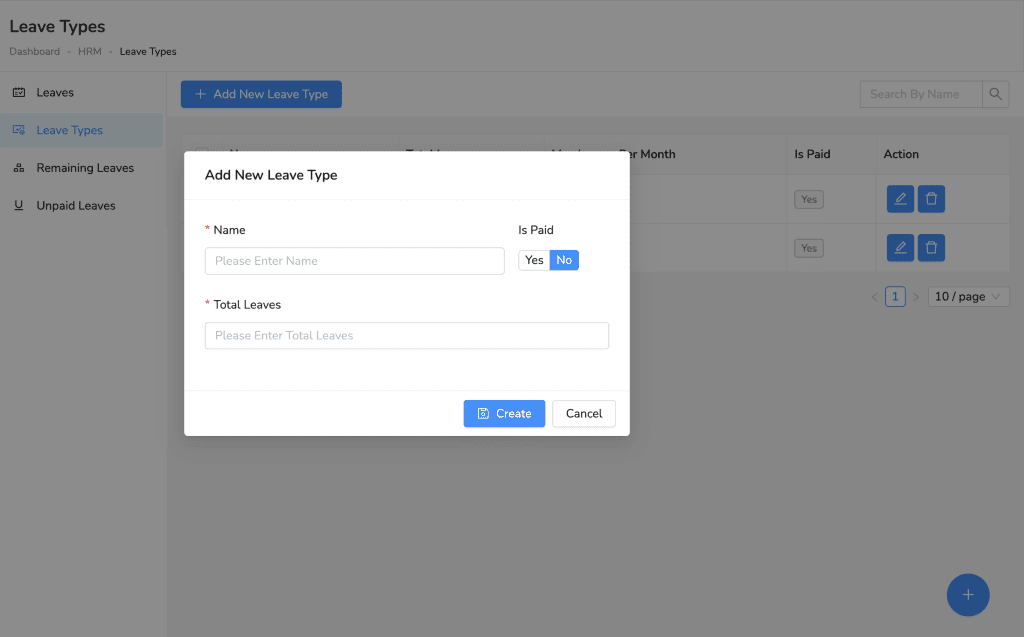
- Click on “+ Add New Leave Type”.
- Enter the Name of the leave type, Total Leaves, and whether it is Paid.
- Click “Create” to define the new leave type.
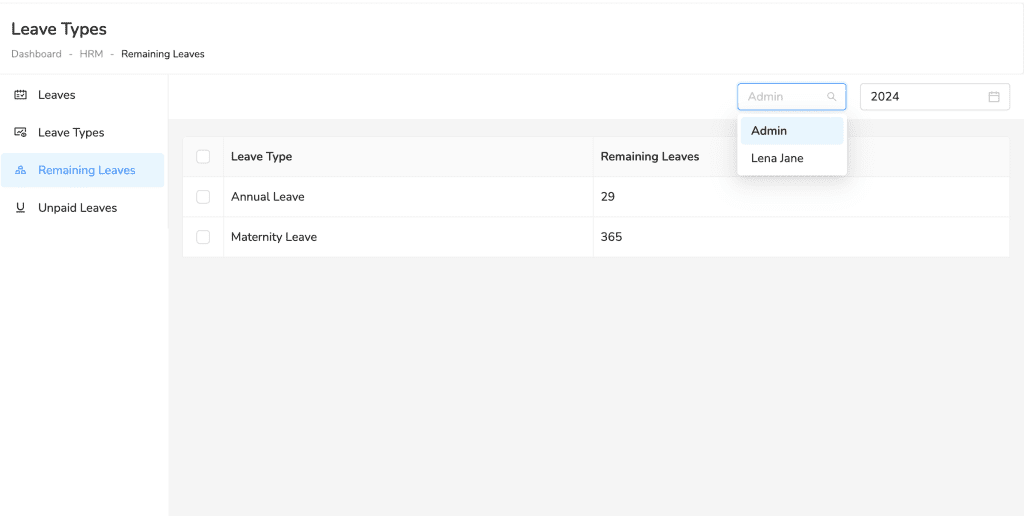
Tracking Remaining Leaves:
- Navigate to the “Remaining Leaves” section under Leave Types in the HRM menu.
- Select the User to view their remaining leaves.
- The table will display the remaining leaves for each leave type.
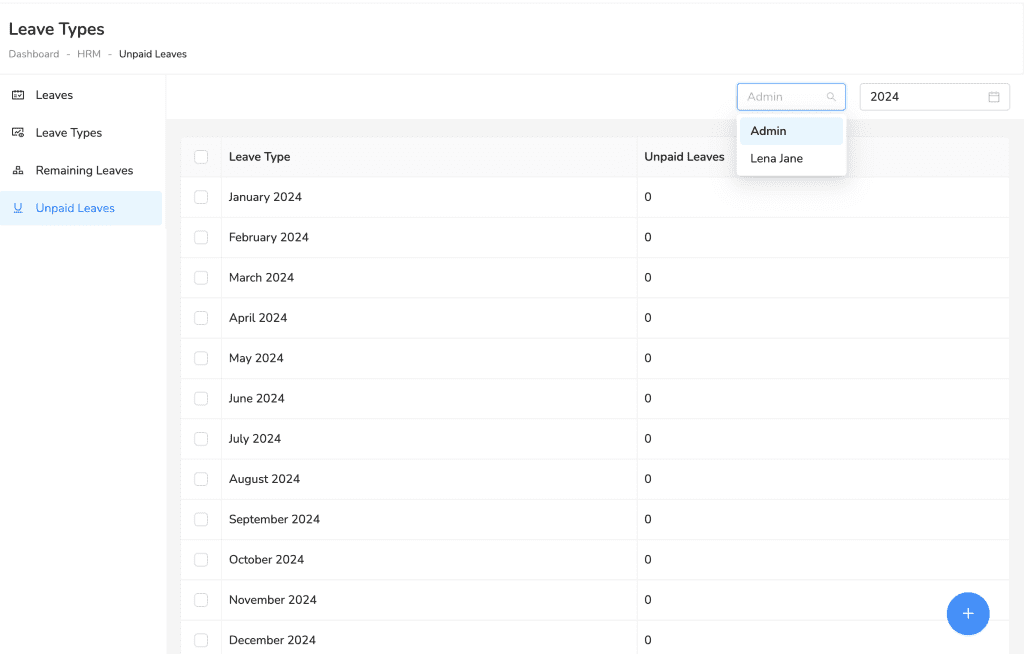
Monitoring Unpaid Leaves:
- Go to the “Unpaid Leaves” section in the HRM menu.
- Select the User and the year to view unpaid leaves.
- The list will show the unpaid leaves by month for the selected user.
