Table of Contents
Adding a new Customer #
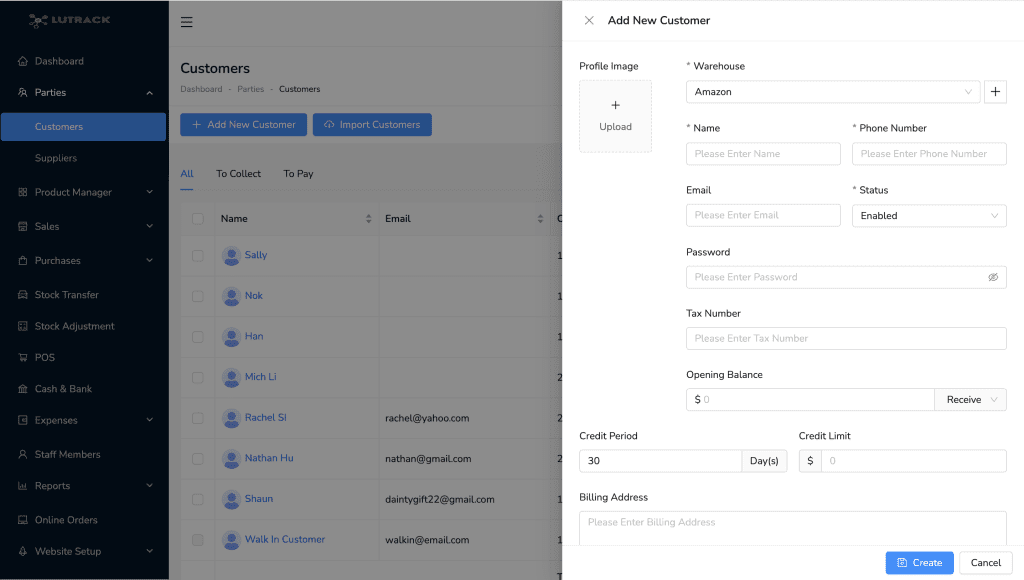
To add a new customer in Lutrack Inventory, follow these steps:
- Navigate to Parties from the left sidebar.
- Click on Customers.
- Click on the Add New Customer button.
- Fill in the customer details:
- Profile Image: Upload a profile image for the customer if desired.
- Warehouse: Select the warehouse associated with the customer.
- Name: Enter the customer’s name.
- Phone Number: Enter the customer’s phone number.
- Email: Enter the customer’s email address.
- Status: Set the status of the customer (e.g., Enabled).
- Password: Set a password for the customer to access their Dashboard.
- Tax Number: Enter the customer’s tax number if applicable.
- Opening Balance: Enter the opening balance for the customer. Select whether it is to receive or to pay.
- Credit Period: Enter the credit period in days.
- Credit Limit: Enter the credit limit amount.
- Billing Address: Enter the billing address for the customer.
- Click on the Create button to save the new customer.

Importing Customers #
To import customers, follow these steps:
- Click on the Import Customers button.
- Download the Sample CSV File:
- Click on the link Click here to download sample csv file to download the template.
- Fill in the required customer details in the CSV file according to the template.
- Upload the CSV File:
- Click on the Upload button and select the completed CSV file from your computer.
- Import the Customers:
- After uploading the file, click the Import button to import the customers into Lutrack Inventory.


