Setting up your account is the first and most crucial step to start using Lutrack Inventory efficiently. Proper configuration of your account ensures that you and your team can leverage all the features of the application seamlessly. In this section, we will guide you through the process of setting up your profile, updating company settings, and ensuring that all necessary information is correctly entered to facilitate smooth operations.uld take about one workday to complete.
Company Settings #
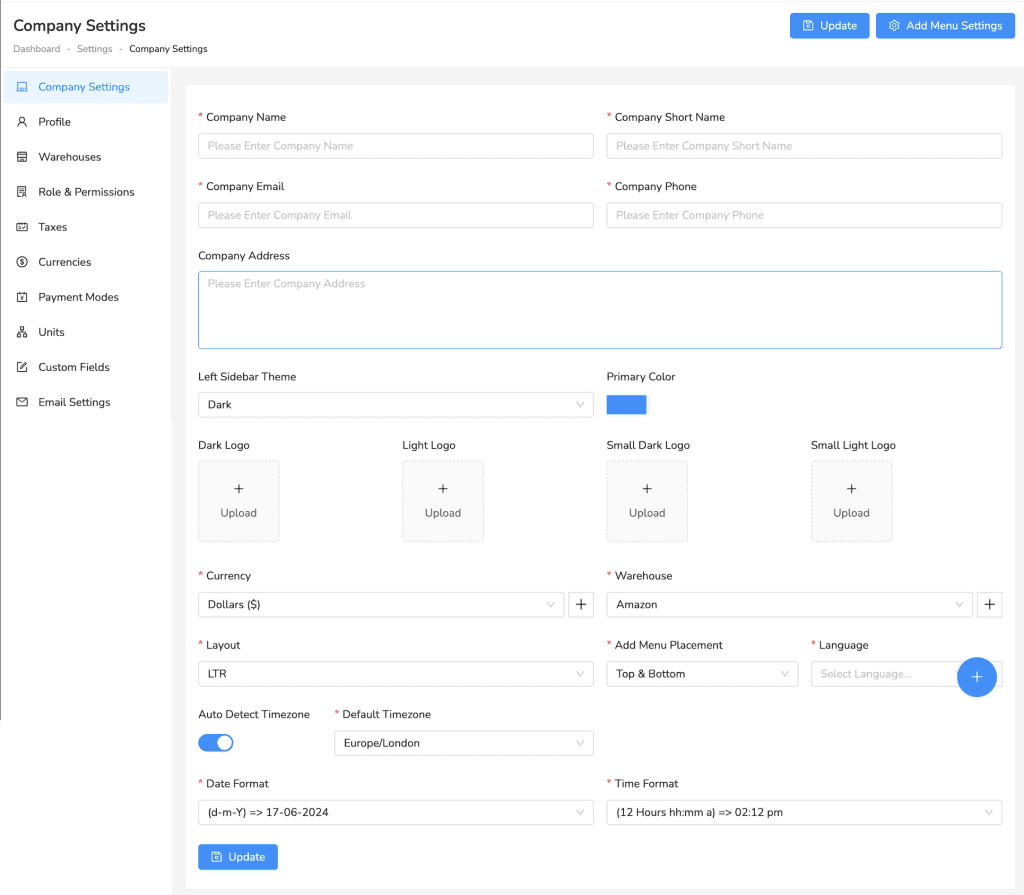
The Company Settings section is accessible exclusively to users with the Admin role or those granted permission to access Company Settings. This page allows you to configure various application settings essential for your business operations. To access this page, navigate to Settings → Company Settings.
In the Company Settings, you can update the following business details:
- Store/Shop Information: Modify your store or shop name, phone number, email address, and physical address.
- Store Logo: Upload and manage your store’s logo to personalize your application.
- Time & Date Format: Set the preferred format for time and dates, which will be reflected across your data tables.
- App Timezone: Adjust the timezone settings to match your business location.
- Business Currency: Select the currency in which your business transactions will be conducted.
- Primary Color: Customize the app’s appearance by changing the primary color for buttons, form items, and other UI elements.
- Warehouse Settings: Add your business warehouses to keep track of inventory.
Properly configuring these settings will ensure that Lutrack Inventory aligns with your business identity and operational preferences.
Setup Your Profile #
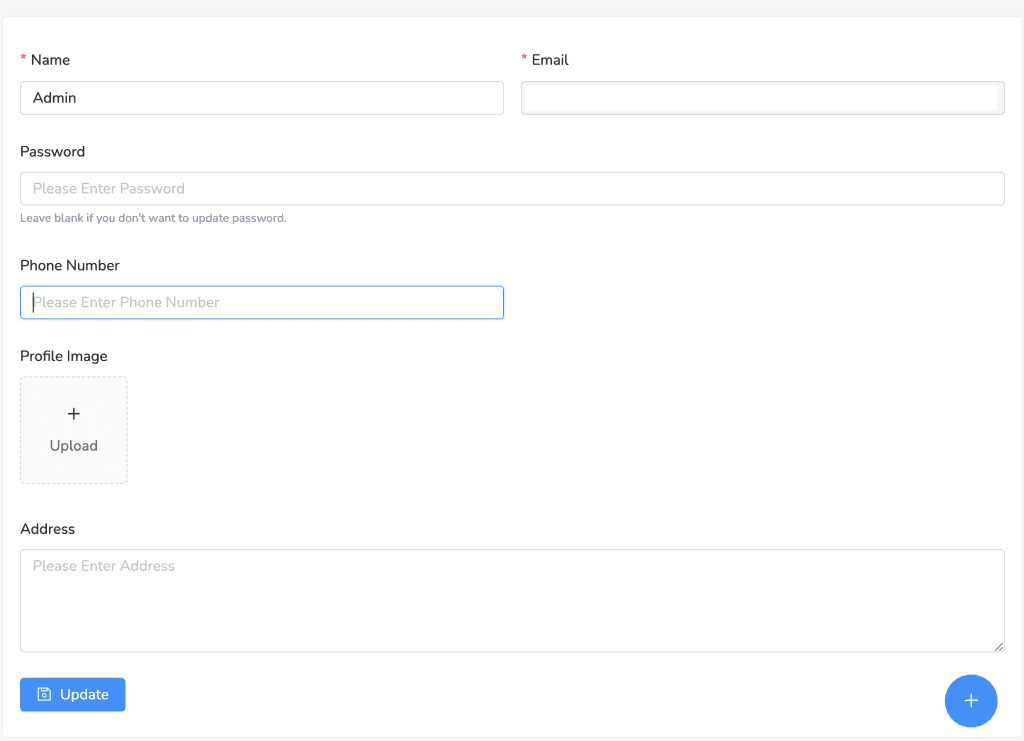
Setting up your profile is a crucial step in getting started with Lutrack Inventory. As an admin, you’ll need to create your personal profile, which includes setting up your login credentials and contact information. This section will guide you through the process of creating your admin name, email, password, and address.
Steps to Set Up Your Profile #
- After logging in for the first time, navigate to Settings → Profile.
- Enter Admin Information:
- Admin Name: Enter your full name. This name will be associated with the admin account and used in communications.
- Email Address: Provide a valid email address. This will be used for login and receiving important notifications.
- Password: Create a strong, secure password.
- Profile Image: Upload your profile image ( optional )
- Enter Address Details : Input your address, including street, city, state, and postal code. This information is essential for record-keeping and communication purposes.
3. Once you are done, review your information and click the save button.
Tips for Creating a Strong Password #
- Length: Use at least 8 characters.
- Complexity: Include a mix of uppercase and lowercase letters, numbers, and special characters.
- Uniqueness: Avoid using easily guessable passwords or common words.
By setting up your profile correctly, you’ll ensure secure access to Lutrack Inventory and receive important updates and notifications related to your business operations.
Add a Warehouse #
Managing multiple warehouses effectively is essential for businesses that operate in different locations. Lutrack Inventory allows you to add and manage warehouses easily. This section will guide you through the process of adding a new warehouse, including entering the necessary details such as name, email, contact number, and additional settings.
Steps to Add a New Warehouse #
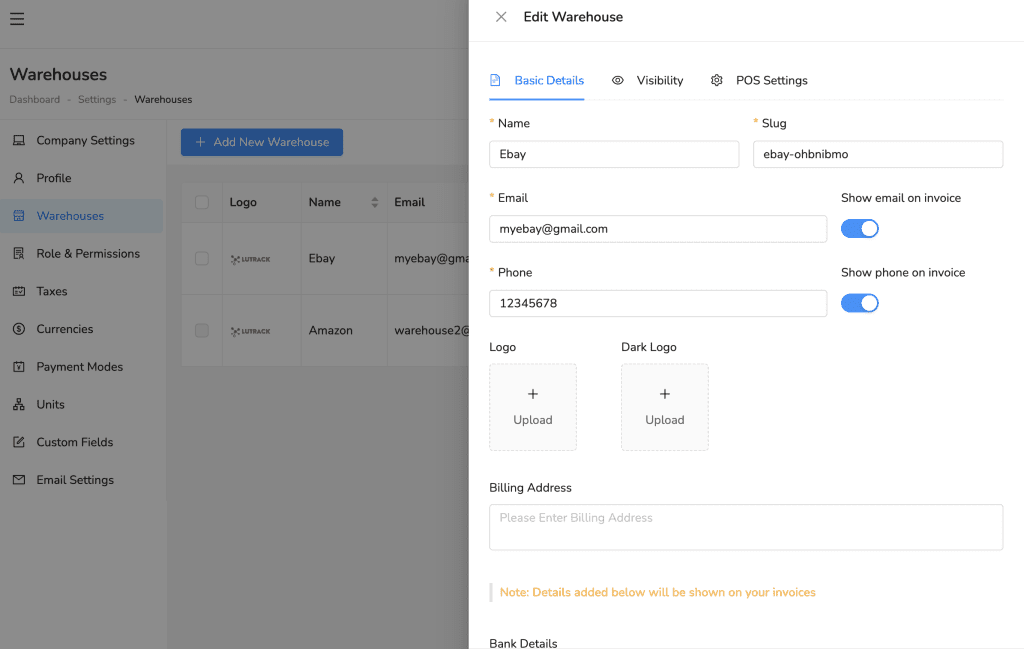
- Navigate to Settings → Warehouses
- Click on the Add New Warehouse button.
- Name: Provide a unique name for the new warehouse. This will help you identify and manage your warehouses efficiently.
- Slug: Enter a slug for the warehouse, which will be used as a unique identifier.
- Email: Enter the email address associated with the warehouse. This can be used for communications and notifications specific to this warehouse.
- Phone: Input the contact number for the warehouse. This is important for logistical coordination and communication.
- Show Email on Invoice: Toggle this option to show or hide the warehouse email on invoices.
- Show Phone on Invoice: Toggle this option to show or hide the warehouse phone number on invoices.
- Logo: Upload the warehouse logo to personalize the appearance.
- Dark Logo: Upload a dark version of the warehouse logo if applicable.
- Billing Address: Enter the billing address for the warehouse. This address will be displayed on invoices.
- Bank Details: Enter your bank details. This will be displayed on invoices.
Visibility Settings
- Navigate to the Visibility tab.
- Customers Visibility: Choose whether to view all customers or only those associated with the warehouse.
- Suppliers Visibility: Choose whether to view all suppliers or only those associated with the warehouse.
- Products Visibility: Choose whether to view all products or only those associated with the warehouse.
POS Settings
- Navigate to the POS Settings tab.
- POS Default Status: Set the default status for POS transactions (e.g., Delivered).
- Show MRP on Invoice: Toggle this option to show or hide the Maximum Retail Price (MRP) on invoices.
- Show Discount & Tax on Invoice: Toggle this option to show or hide discounts and tax details on invoices.
- Barcode Type: Select the type of barcode to be used for the warehouse.
Review the entered details to ensure they are correct and click Save button.
Add Taxes #
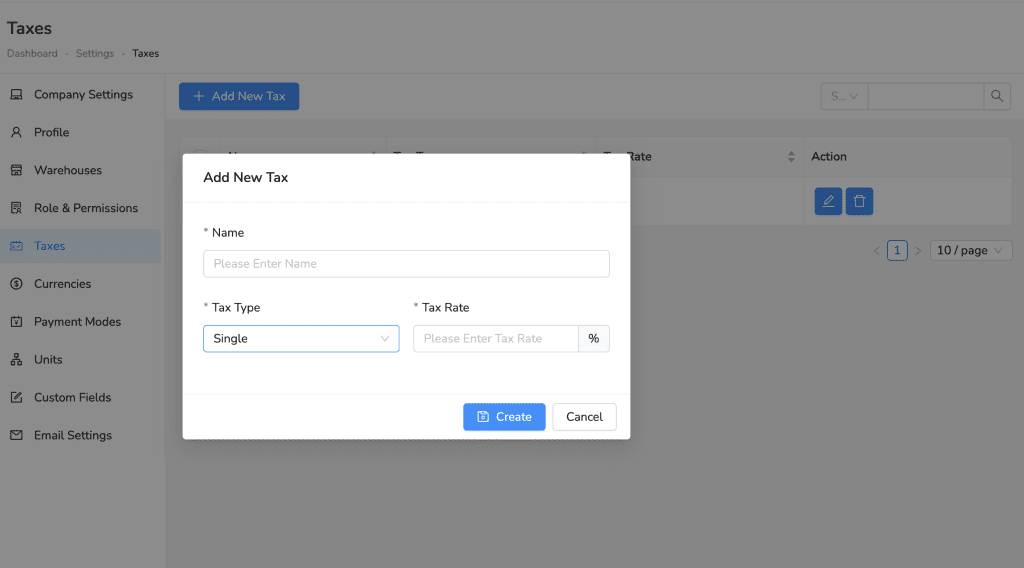
- Locate the Taxes option within Settings and click on it.
- Click Add New Tax.
- Enter a descriptive Name for the tax (e.g., “Sales Tax” or “VAT”).
- In the Tax Rate field, enter the tax percentage as a numerical value (e.g., 10 for 10%).
- Click Create to save the new tax.
Add a New Currency #
- Navigate to the Settings section.
- Locate the Currencies option within Settings.
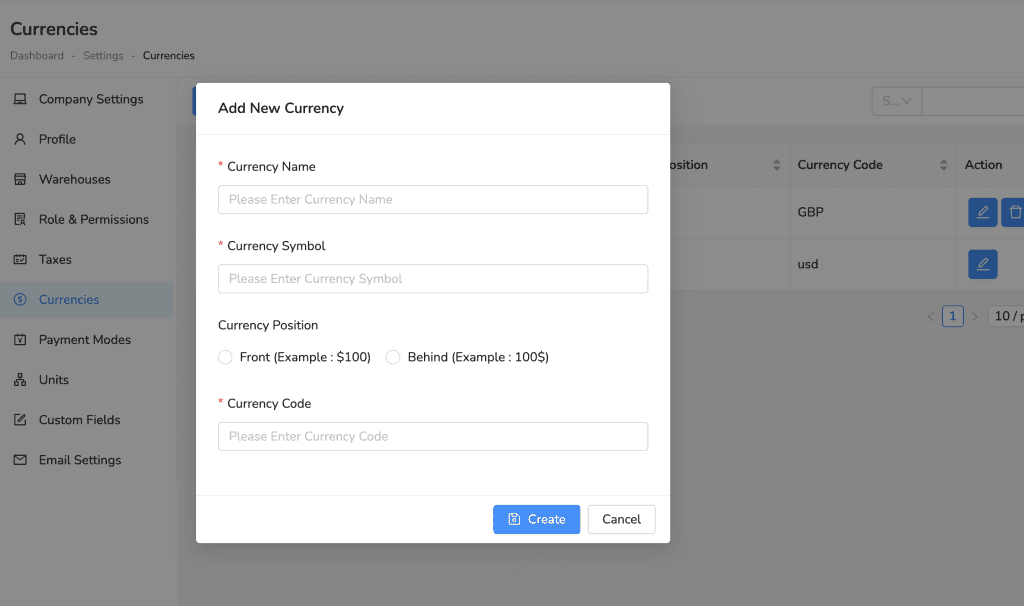
- In the currency management interface, click on Add New Currency.
- In the Currency Name field, enter the full name of the currency (e.g., US Dollar, British Pound).
- In the Currency Code field, enter the three-letter code for the currency (e.g., USD, GBP).
- In the Currency Symbol field, enter the symbol for the currency (e.g., $, £).
- Optionally, you can choose the Currency Position by selecting the appropriate radio button. This determines whether the currency symbol appears before or after the amount (e.g., 100vs100).
- Click Create to save the new currency.
Add a Payment Mode #
- Navigate to the Settings section.
- Locate the Payment Modes option within Settings.
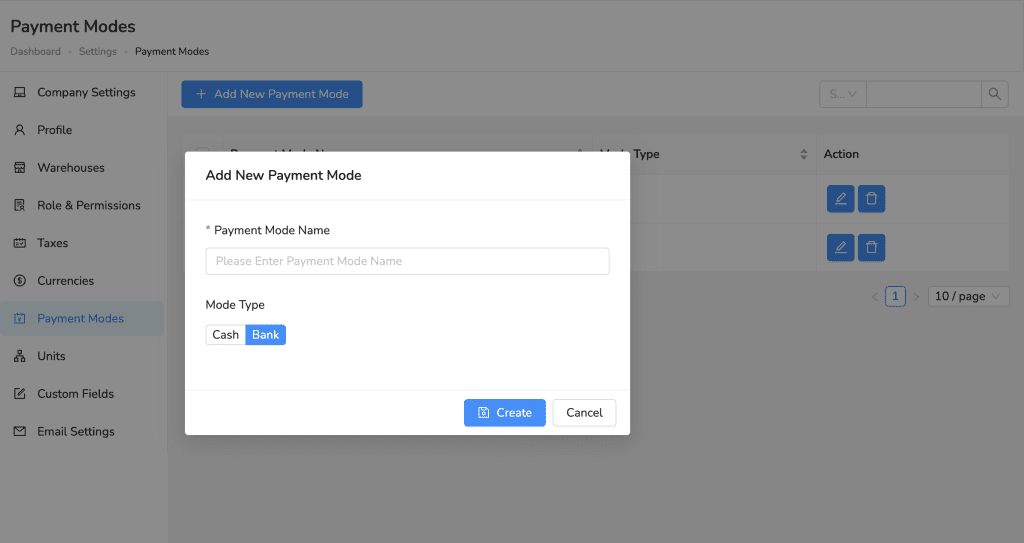
- Click on Add New Payment Mode.
- Enter a descriptive Payment Mode Name (e.g., “Cash”, “Bank Account”).
- Select Payment Type option( Cash or Bank )
- Click Create to save the new payment mode.
Adding Units #
- Navigate to the Settings section.
- Locate the Units option within Settings.
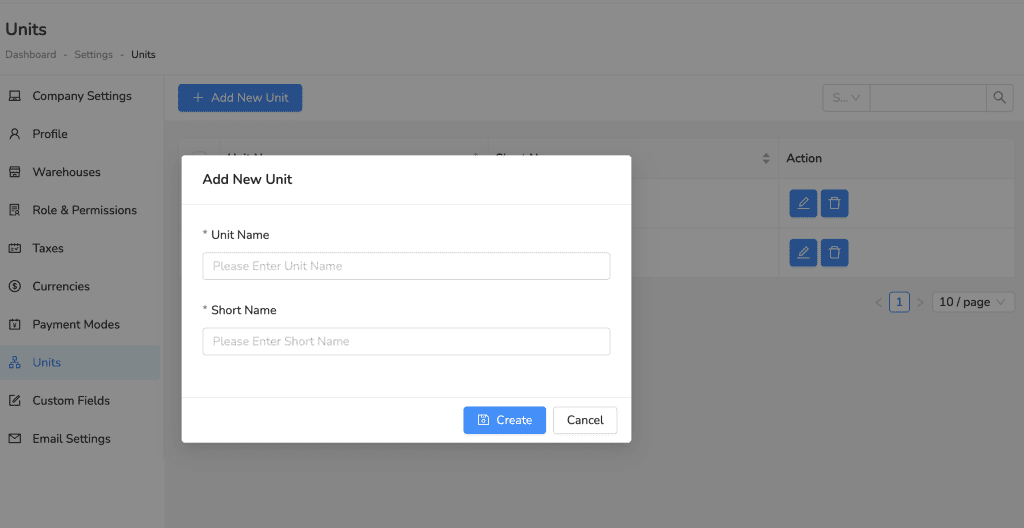
- Click on the Add New Unit button.
- In the Unit Name field, enter the name of the unit you want to add (e.g., “Piece”, “Kilogram”, “Box”).
- In the Short Name field, enter a short abbreviation for the unit name (e.g., “pcs”, “kg”, “bx”).
- Click Create to save the new unit.
Add Custom Fields #
- Navigate to the Settings section.
- Locate the Custom Fields option within Settings.
- Click on the button to Add New Custom Field.
- Enter a descriptive Field Name for your custom field (e.g., “Expiry Date”).
- Click Create to save the new custom field.


